
 |

|
| ActiveWin: Reviews | Active Network | New Reviews | Old Reviews | Interviews |Mailing List | Forums |
|
|
|
|
|
DirectX |
|
ActiveMac |
|
Downloads |
|
Forums |
|
Interviews |
|
News |
|
MS Games & Hardware |
|
Reviews |
|
Support Center |
|
Windows 2000 |
|
Windows Me |
|
Windows Server 2003 |
|
Windows Vista |
|
Windows XP |
|
|
|
|
|
|
|
News Centers |
|
Windows/Microsoft |
|
DVD |
|
Apple/Mac |
|
Xbox |
|
News Search |
|
|
|
|
|
|
|
ActiveXBox |
|
Xbox News |
|
Box Shots |
|
Inside The Xbox |
|
Released Titles |
|
Announced Titles |
|
Screenshots/Videos |
|
History Of The Xbox |
|
Links |
|
Forum |
|
FAQ |
|
|
|
|
|
|
|
Windows XP |
|
Introduction |
|
System Requirements |
|
Home Features |
|
Pro Features |
|
Upgrade Checklists |
|
History |
|
FAQ |
|
Links |
|
TopTechTips |
|
|
|
|
|
|
|
FAQ's |
|
Windows Vista |
|
Windows 98/98 SE |
|
Windows 2000 |
|
Windows Me |
|
Windows Server 2002 |
|
Windows "Whistler" XP |
|
Windows CE |
|
Internet Explorer 6 |
|
Internet Explorer 5 |
|
Xbox |
|
Xbox 360 |
|
DirectX |
|
DVD's |
|
|
|
|
|
|
|
TopTechTips |
|
Registry Tips |
|
Windows 95/98 |
|
Windows 2000 |
|
Internet Explorer 5 |
|
Program Tips |
|
Easter Eggs |
|
Hardware |
|
DVD |
|
|
|
|
|
|
|
ActiveDVD |
|
DVD News |
|
DVD Forum |
|
Glossary |
|
Tips |
|
Articles |
|
Reviews |
|
News Archive |
|
Links |
|
Drivers |
|
|
|
|
|
|
|
Latest Reviews |
|
Xbox/Games |
|
Fallout 3 |
|
|
|
Applications |
|
Windows Server 2008 R2 |
|
Windows 7 |
|
|
|
Hardware |
|
iPod Touch 32GB |
|
|
|
|
|
|
|
Latest Interviews |
|
Steve Ballmer |
|
Jim Allchin |
|
|
|
|
|
|
|
Site News/Info |
|
About This Site |
|
Affiliates |
|
Contact Us |
|
Default Home Page |
|
Link To Us |
|
Links |
|
News Archive |
|
Site Search |
|
Awards |
|
|
|
|
|
|
|
Credits |

|
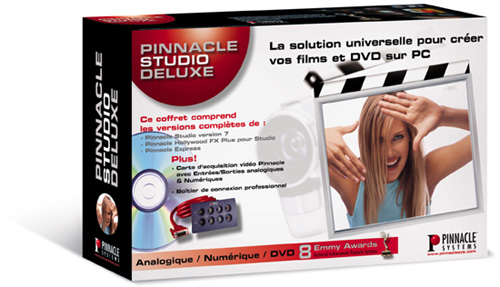
Product: Studio Deluxe |
Studio 7
| Table Of Contents |
| 1:
Introduction 2: Studio 7 3: Pinnacle Express 4: Conclusion |
Studio
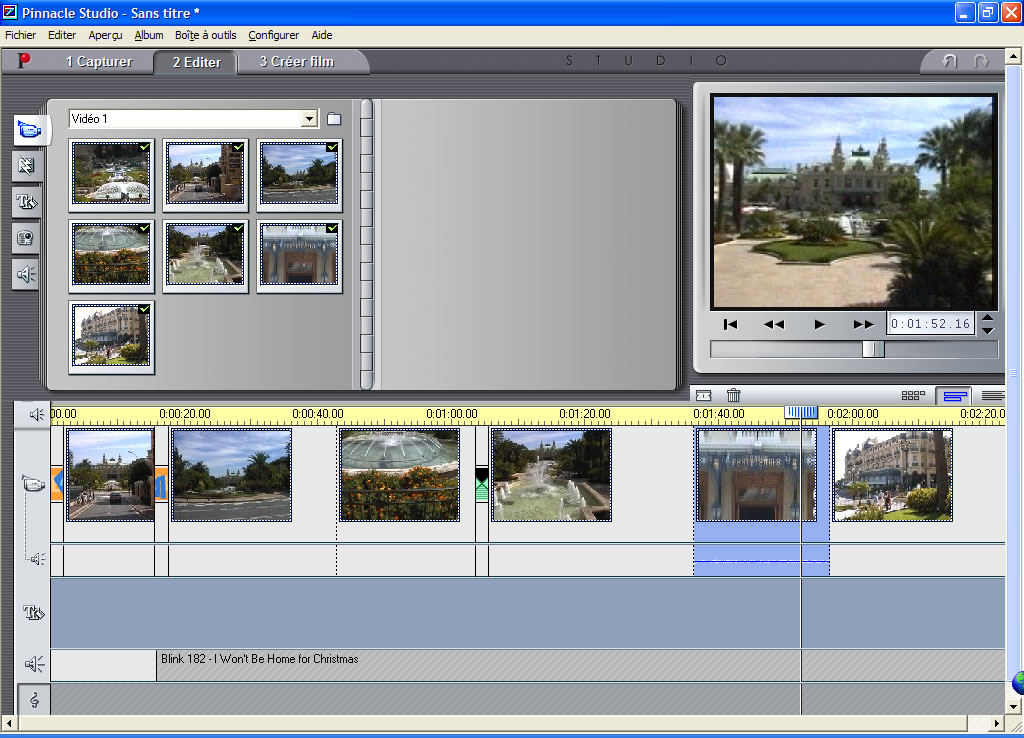
Pinnacle Studio 7 GUI (click
to enlarge)
Studio
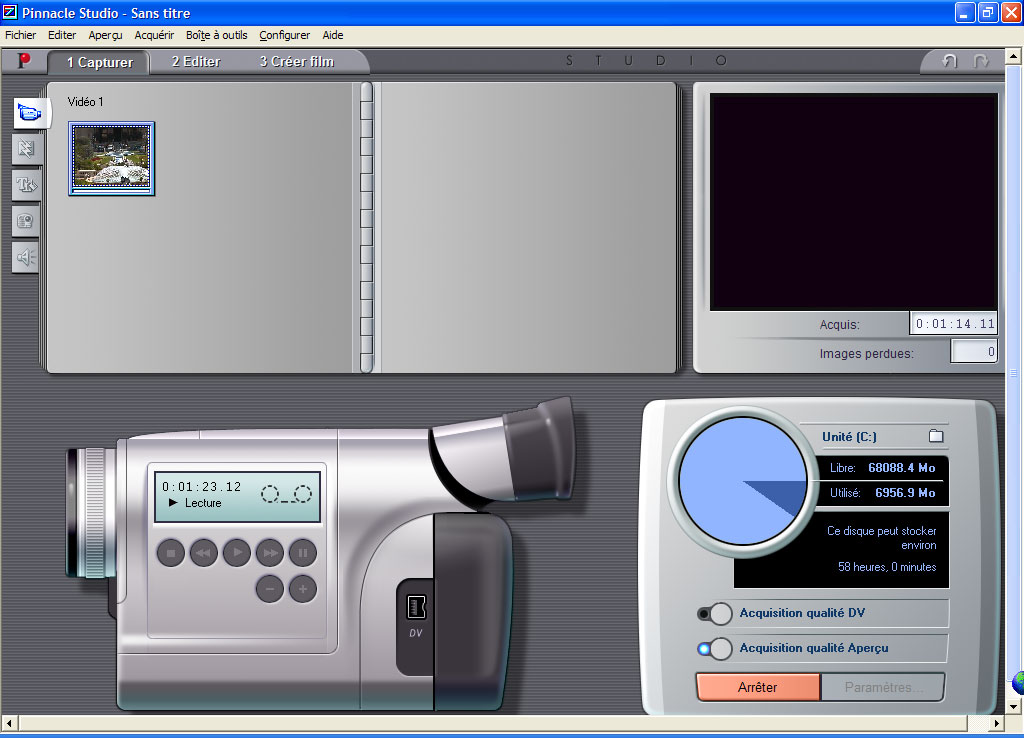
Pinnacle Studio 7
DV Capturing Tab (click to enlarge)
Once your
video is captured, the software will automatically slice it in small scenes
and will fill the �edit� tab album with thumbnails of each video. From now
on editing your video will be a child�s game! You�ll have to drag and drop
the scenes you want to keep on the bottom film of the software. To mount a
specific scene and cut parts of it you don�t want to keep, you just have to
click the small camcorder button displayed on top of the negative. It�ll
instantly display the video toolbox that contains a complete mounting
controller with two monitors: the left one shows the video scene that begins
the clip and the right one displays the last scene of the rush you�re
working on while the preview monitor stays on the screen so you can preview
what your video looks like at any moment on this third monitor. There you
can change the entry point for the current video scene as well as the ending
point by simply sliding two cutters: thus everything that is before and
after the sliding cutters won�t be kept in the final movie. The mounting pad
lets you play continuously the current video footage; get back to the
beginning (cut or not) of the clip. For those of you who want to perform a
highly accurate editing, Studio
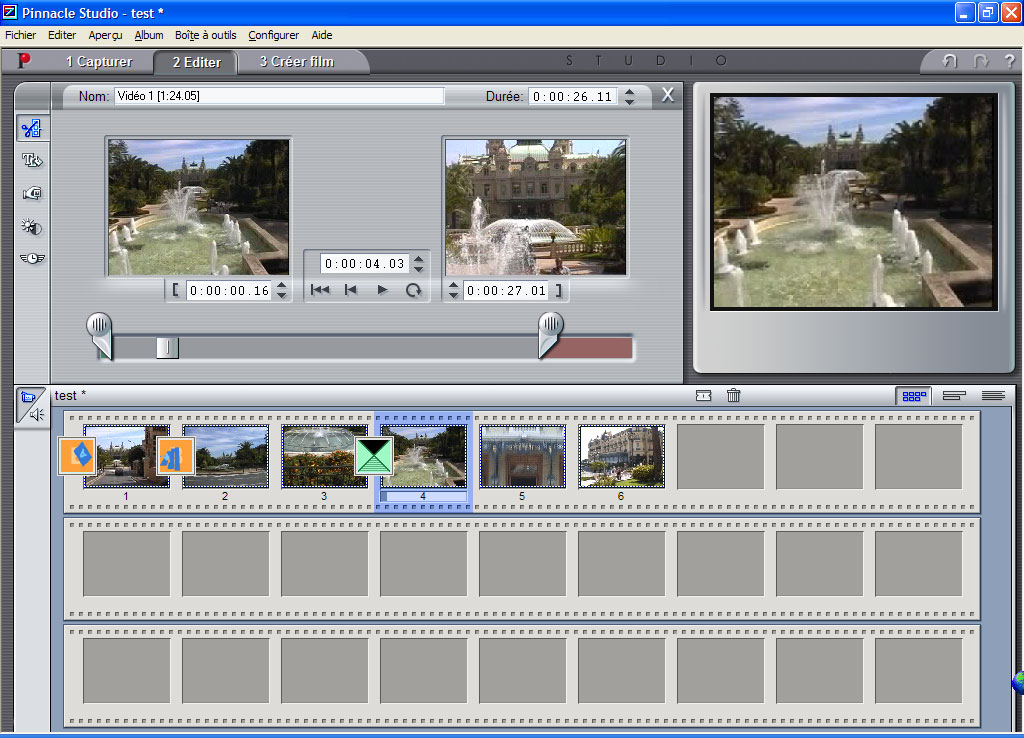
Pinnacle Studio 7 Video
Mouting Tools (click to enlarge)
You can also work on the sound of your movie by changing the volume level of the three different tracks independently: set it at the lowest level and the comments of a boring family meeting can�t be heard anymore freeing the way to replace them by some cool music. There�s two way to change the volume of a video scene: you change the volume for the whole scene that is to say that from the beginning to the end of the scene the volume will be set at the same level, else you can create points in the sound graph displayed in the timeline editor to change the volume level as mush as you want during the same clip.
The
bottom negative area of Studio
Thanks to
the Studio
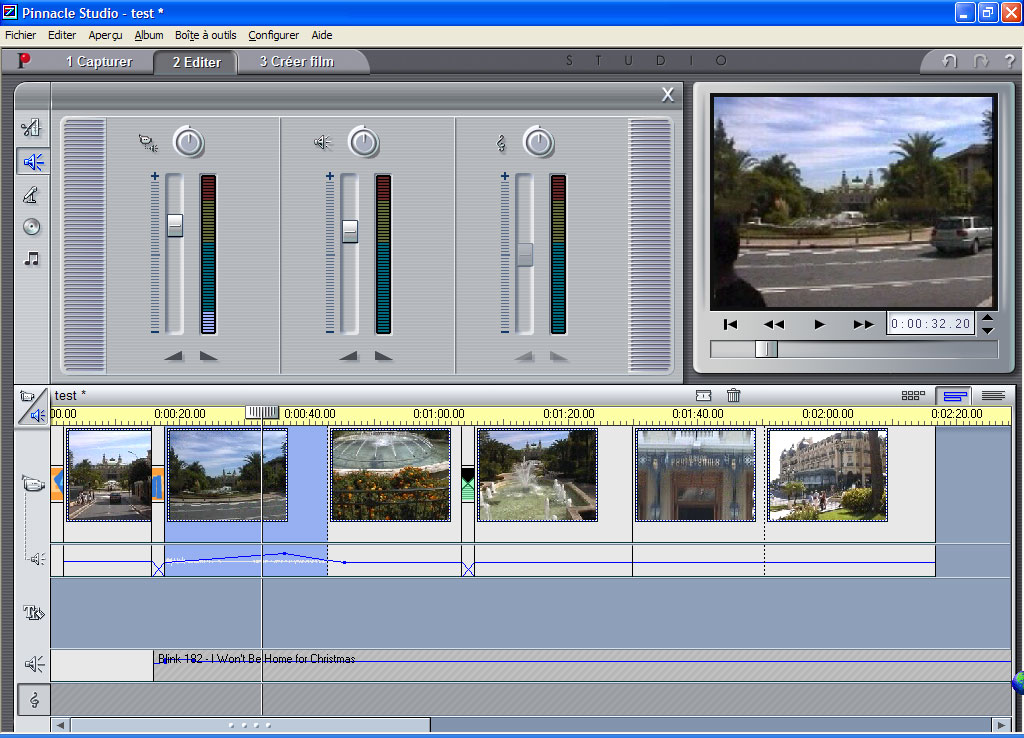

Pinnacle Studio 7 Audio Tools
& MP3 Support (click to enlarge)
Studio
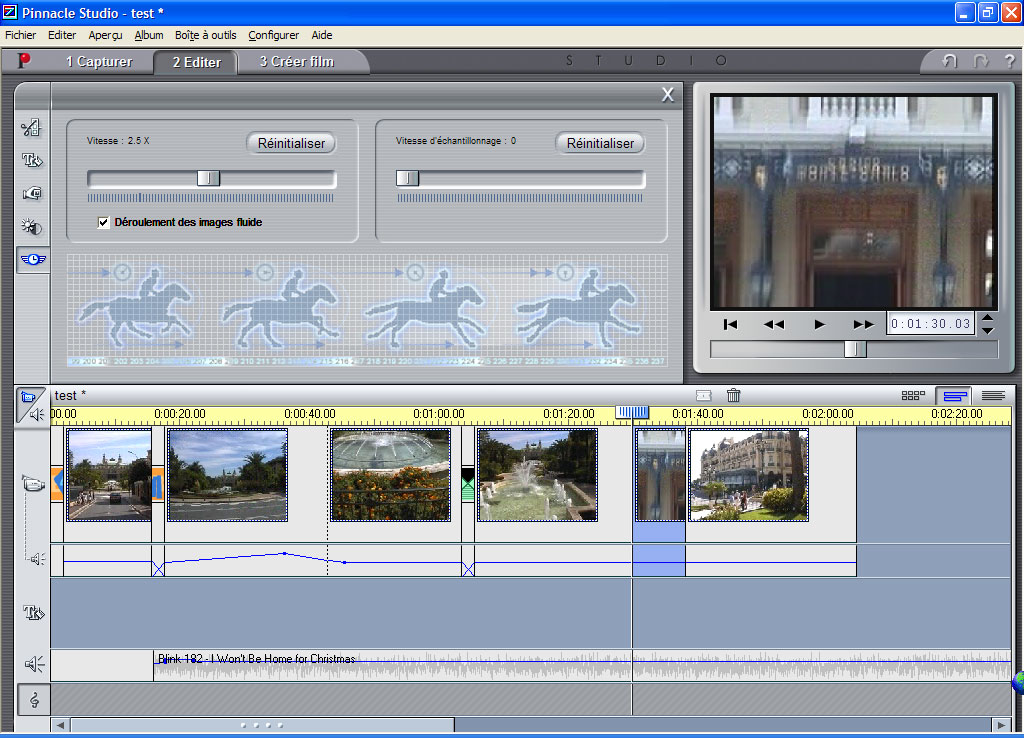
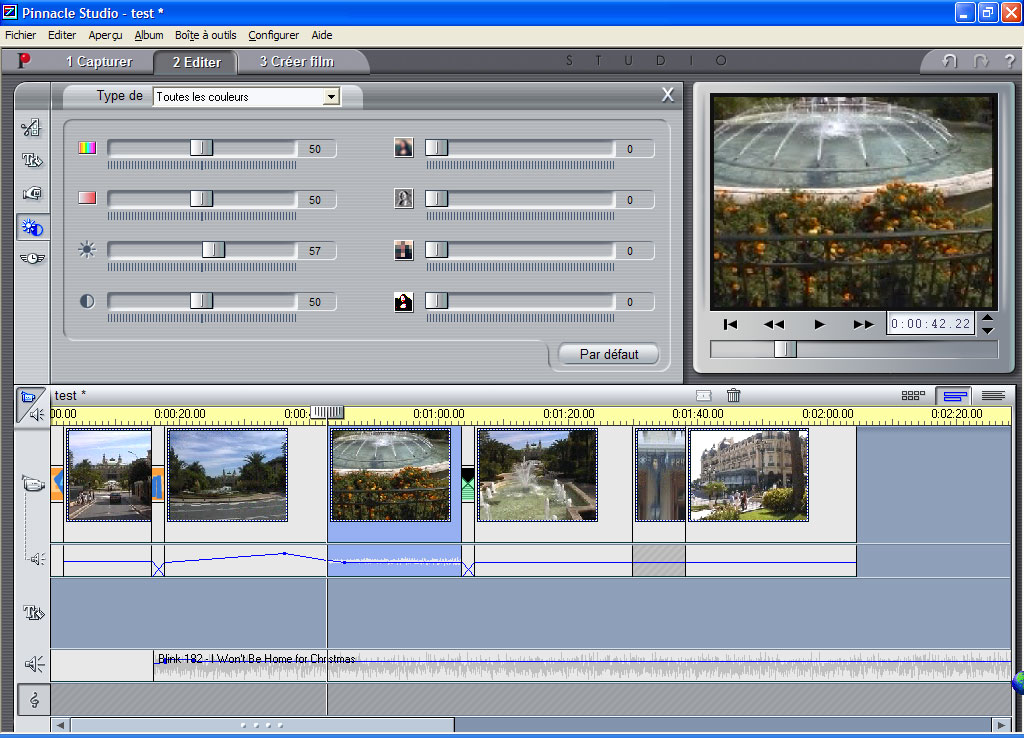
Pinnacle Studio 7 Video Speed
Controls & Video Filters (click to enlarge)
Studio
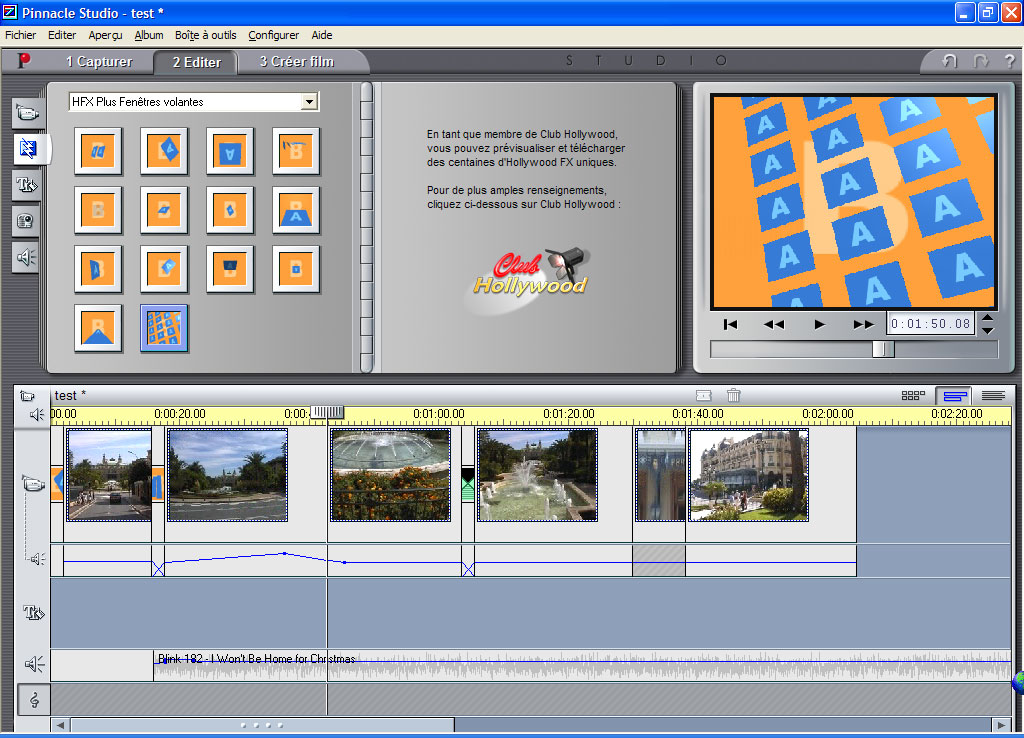
Pinnacle Studio 7: Hollywood
FX Effects (click to enlarge)
Adding
titles to a movie is very important. Whether you want to add subtitles or
full scene credits, Studio
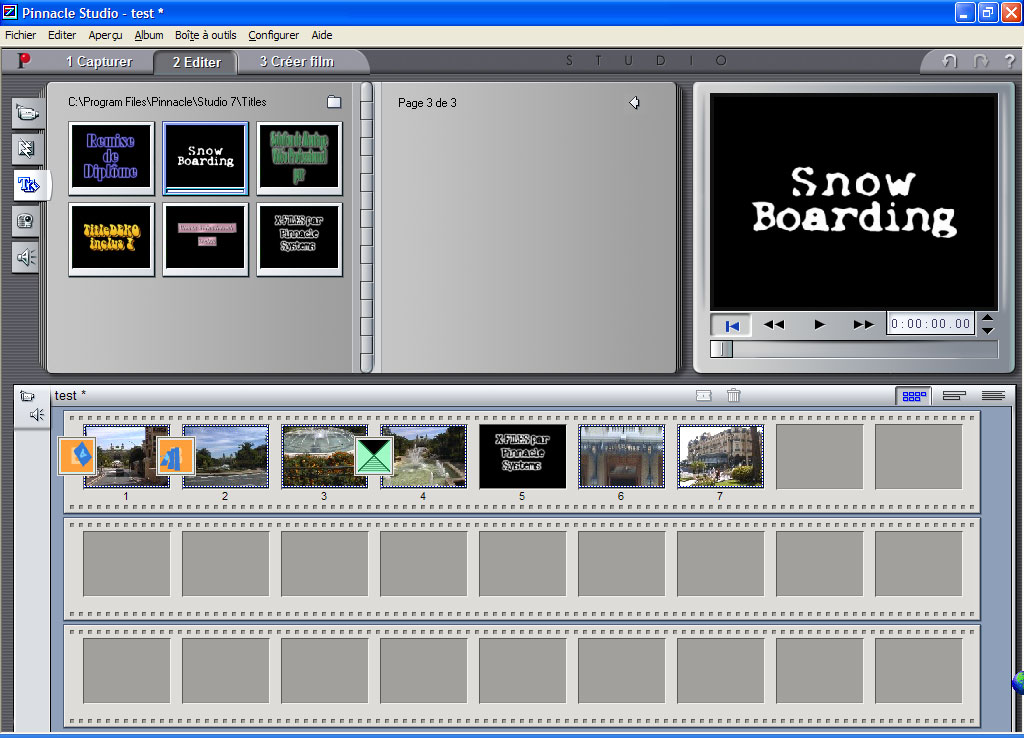
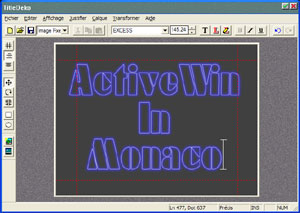
Pinnacle Studio 7 Build-In
Titles and TitleDeko Titler (click to enlarge)
Finally
Studio
Studio
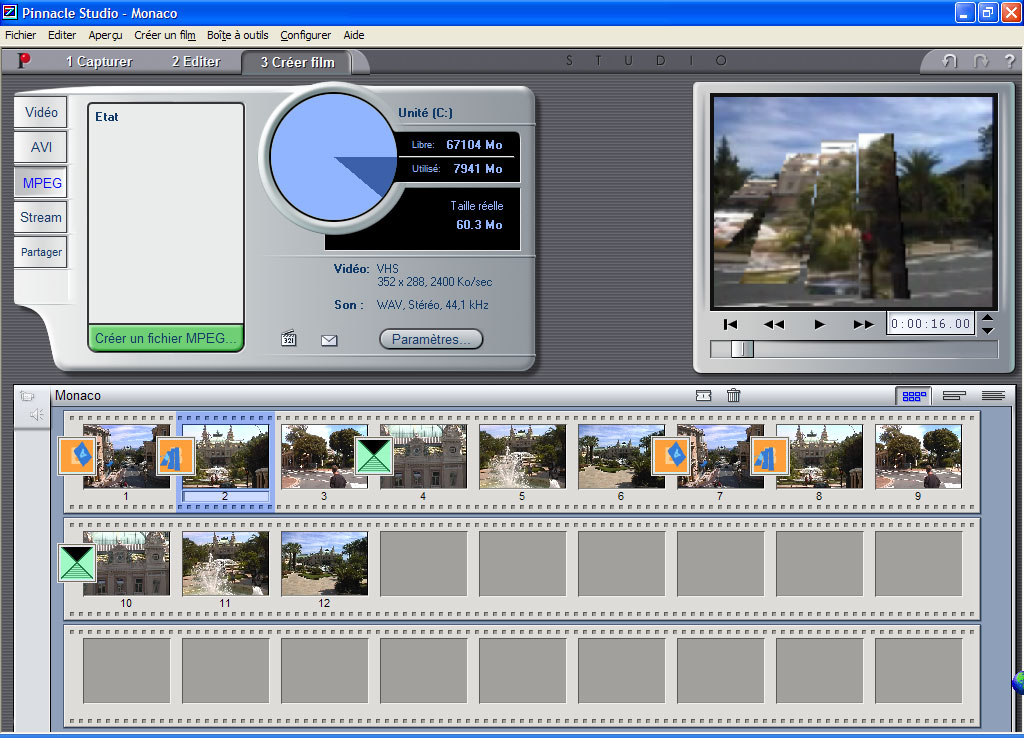
Pinnacle Studio 7 Export Tab
(click to enlarge)
For those
of you who are online addicts Studio
Compatibility
During our extensive tests our JVC GR-DVL9800e DV camcorder worked like a charm with the Studio Deluxe and Studio 7 perfectly controlled it: videos were captured and exported without a hitch. Importing or outputing analogue videos using Studio Deluxe wasn't a problem and just worked great. One regret however: the Studio Deluxe hardware doesn't work with non Pinnacle applications. I mean Pinnacle doesn't provide drivers that are compatible with Adobe Premiere 6.0, for example. Under Premiere 6.0 only the IEEE1394 capture will be available, thus you'll have to forget analogue videos.