|
|
|
||||||||||||||||||||||||||||||||||||||||||||||||||||||||||||||||||||||||||||||||||||||||||||||||||||||||||||||||||||||||||||||||||||||
|
Product:
Macromedia Flash 4 Animation Part II
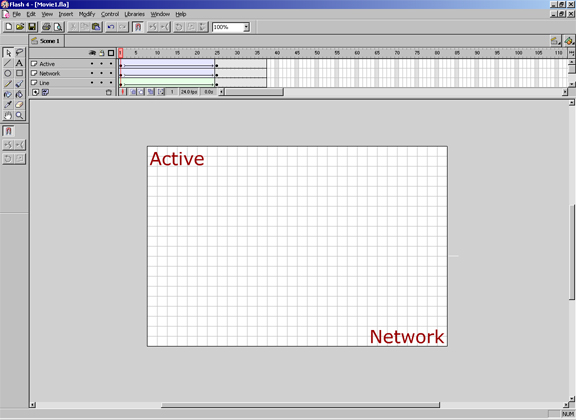
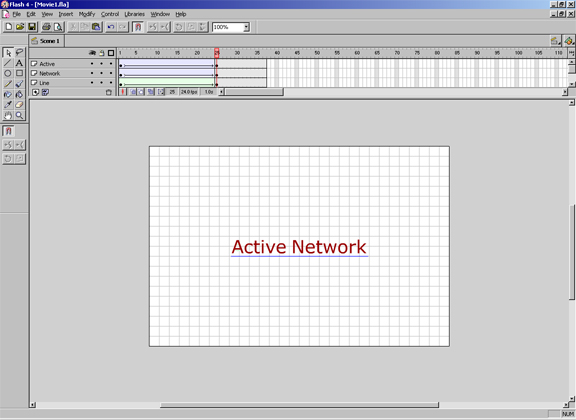
In this section, we'll be adding the blue line and the two green circles to the animation we are creating in this demo. First, let's draw in the blue line. The line starts out white and off to the side and ends up blue and in the middle. It also has to finish in one second so that it ends up under the text "Active Network" when it is in the center. So we are going draw in a white line off to the right in the first frame as shown in the picture below.
Now we have it's starting position. Move to the 24 frame, delete the white line, and draw in a blue line under the text. We now have an animation that looks like this:
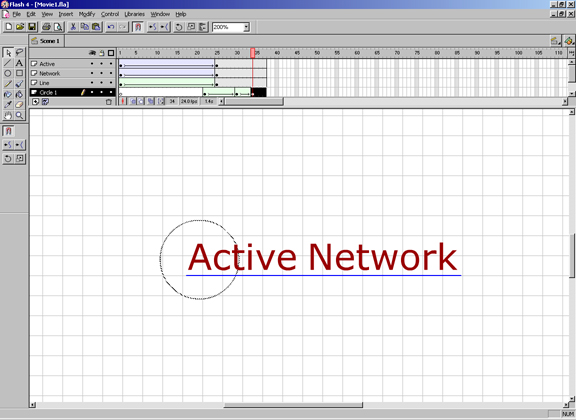
But we're not done, we still have to fill in the frames between 1 and 24. We will do this similarly to the movement of the text, but we will select "Shape" instead of "Motion" in the tweening field. And again, the line is eased in so that it accelerates as it moves. Flash 4 will automatically take care of the size and color difference of the two lines. The next effect in the animation are two green circles that show up and disappear behind the A in the text "Active Network". This is very similar to the way we did the blue line. The only difference being that there are three key frames that we will work with. Let me explain how I created this effect. First, start off by putting a very small, white circle behind the A.
Note that in this picture the circle is selected so that you can see it on top from the background. Also note that this circle effect begins before the A has stopped moving. Now we'll skip ahead a few frames, actually we're going to have to add frames beyond frame 24 sine this effect occurs after the text has stopped moving. In this frame, we'll put a green circle. Then we'll go back and set the Tweening so that it fills in the blank frames in between.
This frame will be the "greenest" frame - from here the circle will start to fade back to white so that it appears as though it faded in and back out as it grew. So now skip ahead a few frames and add a large white circle and tween in the middle.
Again, note that the circle is actually white, but it is selected so that you can see it on top of the background. Now that we have this done, drag the mouse over the frames that the circles are in and copy them. After this, insert them below the current layer and make these set of circles start just after the first. This way it looks as though the two circles appear and fade on after the other.
|
||||||||||||||||||||||||||||||||||||||||||||||||||||||||||||||||||||||||||||||||||||||||||||||||||||||||||||||||||||||||||||||||||||||
|
This site is not related to the Microsoft Corporation in any way. Windows and the Windows logo are trademarks of the Microsoft Corporation. ActiveWindows is an independent site. The information and sources here are obtained from series of hard work & research. |